
| 일 | 월 | 화 | 수 | 목 | 금 | 토 |
|---|---|---|---|---|---|---|
| 1 | 2 | 3 | ||||
| 4 | 5 | 6 | 7 | 8 | 9 | 10 |
| 11 | 12 | 13 | 14 | 15 | 16 | 17 |
| 18 | 19 | 20 | 21 | 22 | 23 | 24 |
| 25 | 26 | 27 | 28 | 29 | 30 | 31 |
- 내장객체
- https://start.spring.io
- unboxing
- 언박싱
- 클래스
- 루프
- 콜렉션
- 싱글턴
- 제너릭
- suvlet
- boxing
- dependency
- 스프링
- Scanner
- 컬렉션
- 메소드
- 인텔리제이
- Jenkins
- bootstrap
- maven
- 무한
- 빌드
- wrapper
- 박싱
- start.spring.io
- 제네릭
- Java
- 자동형변환
- 싱글톤
- Short
- Today
- Total
Developer Gonie
9. 스프링(Spring), 자동으로 생성 및 관리되게할 객체를 등록하는 Spring Bean Configuration XML 파일 생성 및 작성방법 본문
9. 스프링(Spring), 자동으로 생성 및 관리되게할 객체를 등록하는 Spring Bean Configuration XML 파일 생성 및 작성방법
이대곤 2022. 8. 23. 19:42* 아래서 'Spring Bean Configuration XML 파일 작성방법 Case2'
어노테이션 @Component와 @Autowired, @Qualifier 를 이용한 DI(의존성 주입) 방식을
프로젝트에서 적용하게 될거 같다.
* 아래에서 Main 클래스의 main 메소드를 보면 xml 혹은 컴포넌트 스캔을 이용해 컨테이너를 생성하는데,
이때 xml에서 <Bean> 태그로 작성된 클래스의 객체 혹은
@Componet 어노테이션이 붙은 클래스의 객체의 생성자가 즉시 호출되더라.
이말은 즉슨 컨테이너를 생성하는 즉시, 관리해야할 이 객체들을 생성하여 가지고 있다는 뜻임.
이 객체들이 전부 생성될 때는 의존관계에 있는 것들은 자동으로 주입해준다.
아래서 생략이 가능한 속성 및 간소화 방법
// property 태그 사용시
// 값을 넘기는 방식으로 자식으로 value 태그를 넣든거 바로 value 속성을 추가하는 방식이 존재함

<property name="eng" value="80"/>

<property name="eng">
	<value type="int">80</value>
</property>


// value 태그에서 type 속성은 생략가능
<property name="eng">
	<value>80</value>
</property>

constructor-arg>
	<value>조이</value>
</constructor-arg>

constructor-arg>
	<value type="java.lang.String">조이</value>
</constructor-arg>
Spring Bean Configuration XML 파일 생성방법
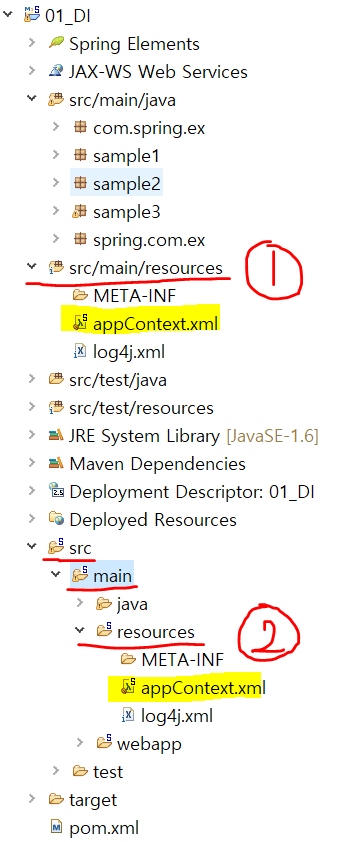
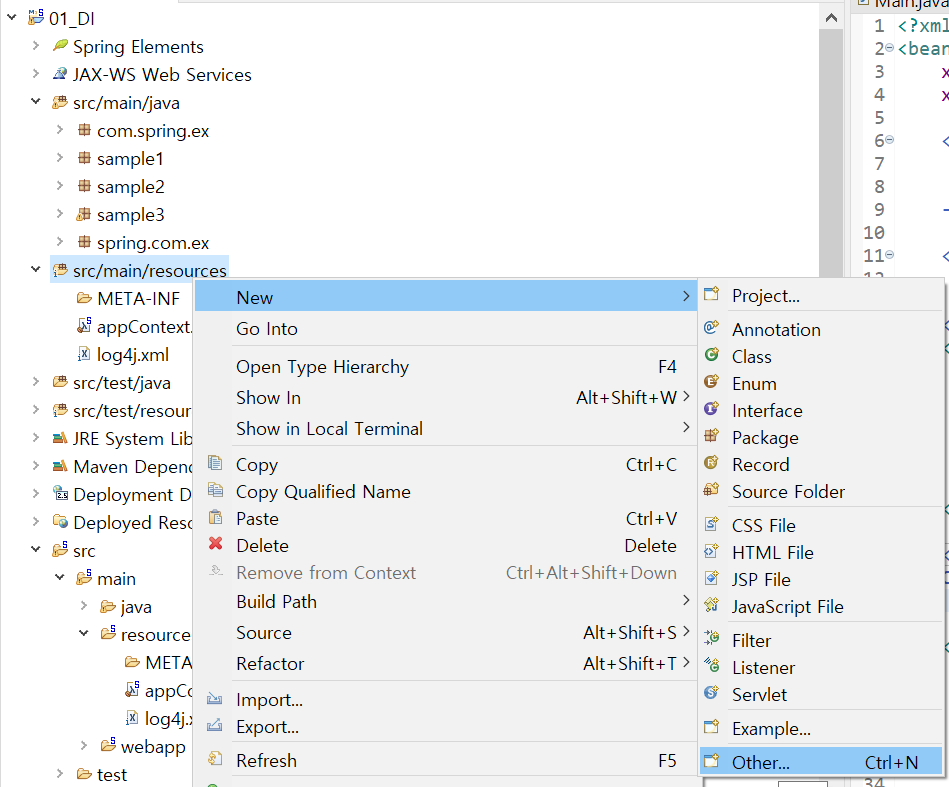
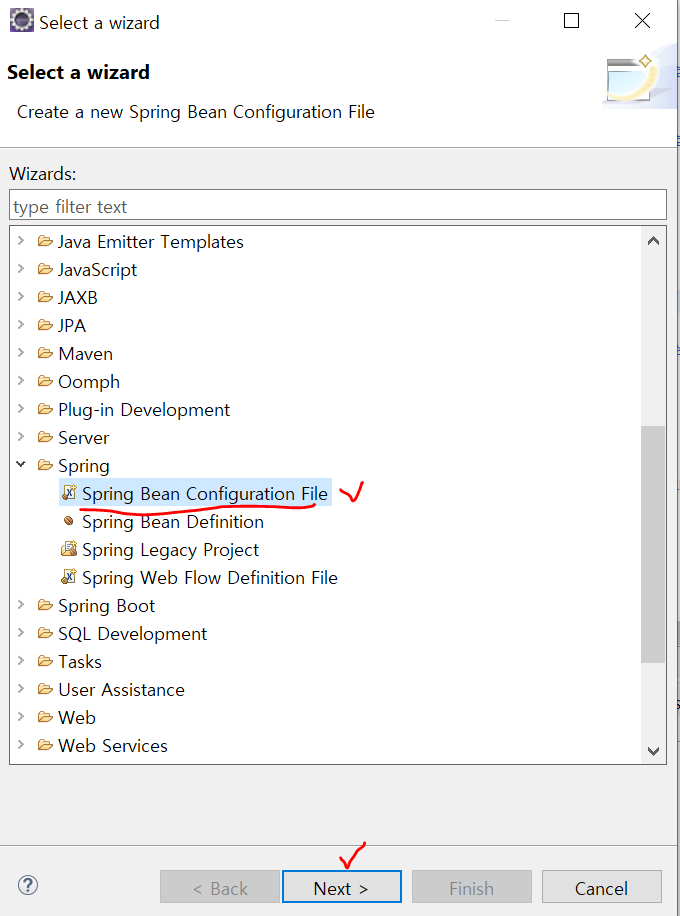
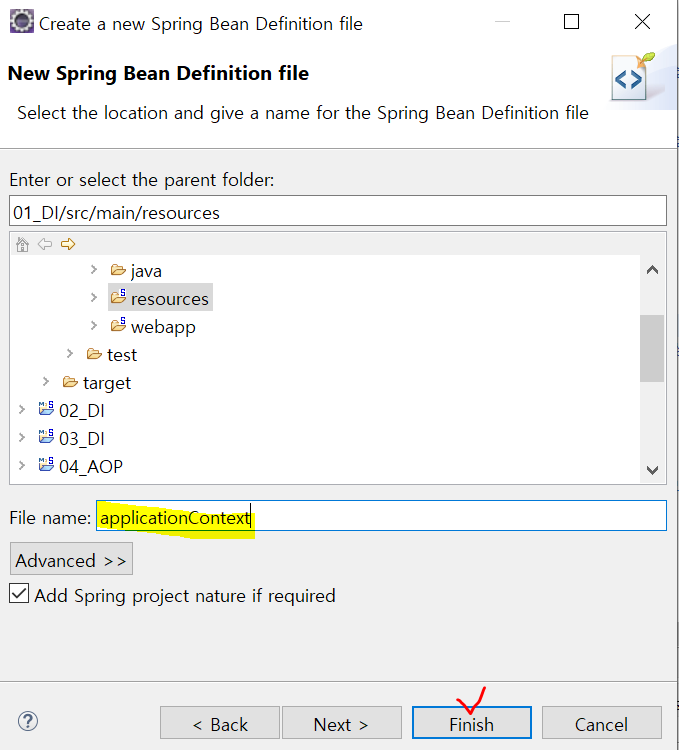
아래서 1번위치, 2번위치는 둘 다 같은 곳이므로 src/main/resources/ 아래서만 만들면 되며
XML파일의 파일명은 아무렇게나 작성해도 되는데 보틍은 "ApplicationContext" 라고 지어준다.
(파일명을 임의대로 지어도 되는 이유는 컨테이너 객체 생성시 생성자로 파일명을 파라미터로 넘겨주기 때문)
Spring Bean Configuration XML 파일 작성방법 Case1
(컨테이너에 의해 자동으로 생성되고 관리될 객체를 직접 <bean> 태그를 이용해 작성하는 경우)
주의할 점이 있는데, 아무리 컨테이너가 객체를 자동으로 생성한다고 해도 각 객체는 멤버변수를 가지고 있기 때문에 이 변수에 어떤 값이 주입된 상태로 객체를 생성할지는 우리가 명시해줘야 한다.
이를 가능하게 하는 방법에는 2가지가 있는데
setter를 이용해 주입되도록 하는 방식, 생성자를 이용해 주입되도록 하는 방식이 존재한다.
태그로 이를 표현하면 각각 <property>, <constructor-arg> 가 사용되는데
태그 대신에 네임스페이스를 이용한 방식도 있다.
Case1 경우의 XML 작성 방법을 설명하기 위한 예시로, 2개의 인터페이스 Circle, Point이 존재하고
이 둘을 각각 상속받은 구현클래스 CircleImpl, PointImpl 가 존재한다고 가정하자.
그런데, CircleImpl 는 생성자가 있으면서, setter 는 없으며
PointImpl 는 생성자가 없으면서, setter는 있다는 점을 알아두자.
<?xml version="1.0" encoding="UTF-8"?>
<beans xmlns="http://www.springframework.org/schema/beans"
	xmlns:xsi="http://www.w3.org/2001/XMLSchema-instance"
	xsi:schemaLocation="http://www.springframework.org/schema/beans http://www.springframework.org/schema/beans/spring-beans.xsd">

	<!-- 이것을 XML로 표현하면 아래와 같음
	sample3.PointImpl point = new sample3.PointImpl()
	point.setXpos(3.0)
	point.setYpos(4.0)
	-->

	<!-- bean 태그는 생성자를 호출하는 기능이며, 컨테이너에 의해 생성될 객체의 클래스 이름을 명시한다.
	     id 속성은 생성될 객체를 관리할 참조변수명을 의미 -->
	<!-- property 태그는 bean태그에 의해서 객체가 생성된 이후 setter 메소드를 호출하는 기능이며, jsp의 setProperty와 같음 -->
	<bean class="sample3.PointImpl" id="point">
		<!-- sample3.PointImpl.setXpos() 호출 -->
		<property name="xpos">
			<value type="double">3.0</value>
		</property>

		<!-- sample3.PointImpl.setYpos() 호출 -->
		<property name="ypos">
			<value type="double">4.0</value>
		</property>
	</bean>


	<!-- 이것을 XML로 표현하면 아래와 같음
	Circle circle = new CircleImpl(point, 10.0)
	 -->

	<!-- bean 태그는 컨테이너에 의해 생성될 객체의 클래스 이름을 명시하는 기능으로, id 속성은 생성될 객체를 관리할 참조변수명을 의미 -->
	<!-- constructor-arg 태그는 bean태그에 의해서 생성자가 호출될 때, 생성자쪽으로 파라미터를 넘기는 기능 -->
	<bean class="sample3.CircleImpl" id="circle">
		<constructor-arg>
			<!-- 객체를 생성자의 파라미터로 넘기고 싶다면 ref 태그를 사용 -->
			<ref bean="point"/>
		</constructor-arg>

		<constructor-arg>
			<!-- 변수를 생성자의 파라미터로 넘기고 싶다면 value 태그를 사용 -->
			<value type="double">10.0</value>
		</constructor-arg>
	</bean>

</beans>
기출변형1.
만약 어떤 객체가 멤버변수 2개를 갖는데,
1개 멤버변수는 setter 로 값을 주입하고,
1개 멤버변수는 생성자로 갑을 주입하고 싶은 경우
=> <bean> 태그 안에서 <property> 태그, <constructor-arg> 태그를 혼합하여 사용하면 된다.
<?xml version="1.0" encoding="UTF-8"?>
<beans xmlns="http://www.springframework.org/schema/beans"
	xmlns:xsi="http://www.w3.org/2001/XMLSchema-instance"
	xsi:schemaLocation="http://www.springframework.org/schema/beans http://www.springframework.org/schema/beans/spring-beans.xsd">

	<!--
	example3.CalcBeanImpl bean = new example3.CalcBeanImpl(2);
	bean.setSu1(4)
	 -->

	<!-- 생성자 및 세터로 주입하는 것 -->
	<bean class="example3.CalcBeanImpl" id="bean">
		<!-- 생성자를 통한 주입 -->
		<constructor-arg>
			<value type="int">2</value>
		</constructor-arg>

		<!-- setter를 통한 주입 -->
		<property name="su1">
			<value type="int">4</value>
		</property>
	</bean>
</beans>
기출변형2.
네임스페이스를 이용해서 기출변형1을 처리하는 경우
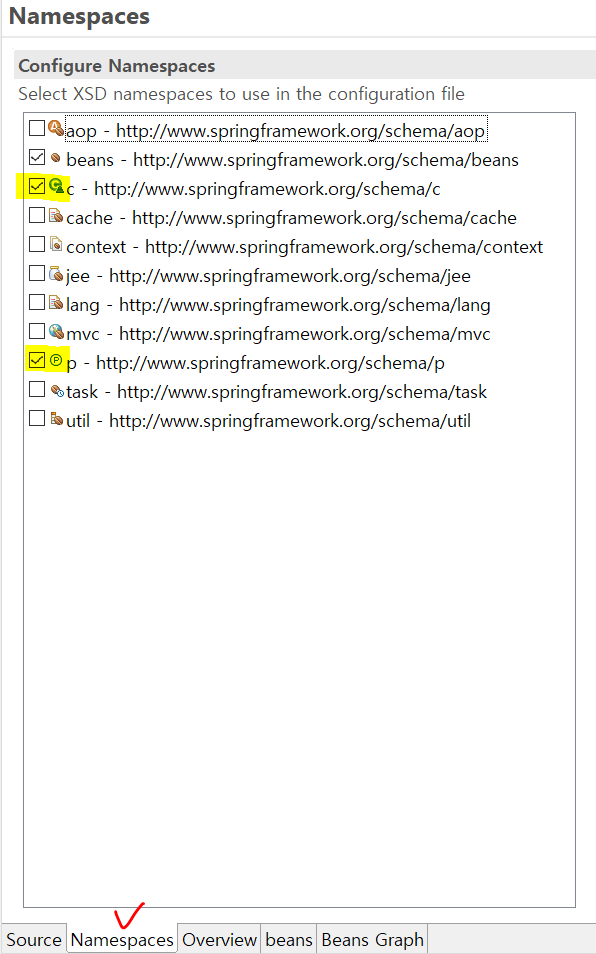
<?xml version="1.0" encoding="UTF-8"?>
<beans xmlns="http://www.springframework.org/schema/beans"
	xmlns:xsi="http://www.w3.org/2001/XMLSchema-instance"
	xmlns:p="http://www.springframework.org/schema/p"
	xmlns:c="http://www.springframework.org/schema/c"
	xsi:schemaLocation="http://www.springframework.org/schema/beans http://www.springframework.org/schema/beans/spring-beans.xsd">

	<!--
	example3.CalcBeanImpl bean = new example3.CalcBeanImpl(2);
	bean.setSu1(4)
	 -->

	<!-- 네임스페이스를 이용한 주입, c는 constructor를 의미, p는 property 태그를 의미 -->
	<!-- 멤버변수에 객체를 주입하고 싶다면 c:su2-ref="다른 bean의 id" 혹은 p:su1-ref="다른 bean의 id" 로 처리하면 됨 -->
	<bean class="example3.CalcBeanImpl" id="bean" c:su2="2" p:su1="4"> </bean>
</beans>
package sample3;
import org.springframework.beans.factory.BeanFactory;
import org.springframework.beans.factory.xml.XmlBeanFactory;
import org.springframework.context.ApplicationContext;
import org.springframework.context.support.ClassPathXmlApplicationContext;
import org.springframework.context.support.FileSystemXmlApplicationContext;
//이런 라이브러리를 사용하려면 sts를 설치해줘야함. 지금은 설치해줘서 사용가능한 것임
import org.springframework.core.io.ClassPathResource;
import org.springframework.core.io.Resource;
public class Main {
public static void main(String[] args) {
/* 객체를 생성하는 방법1. 직접 객체를 생성하는 방식
Point point = new PointImpl();
point.setXpos(3.0);
point.setYpos(4.0);
CircleImpl circle = new CircleImpl(point, 10.0);
circle.display();
*/
/* 객체를 생성하는 방법2. BeanFactory 컨테이너를 이용해 객체가 생성되도록 하는 방법
Resource resource = new ClassPathResource("appContext.xml"); //부모가 자식을 관리하개 함.
BeanFactory factory = new XmlBeanFactory(resource); // resource 변수가 관리하는 xml 파일에 가서 설정해놓은 대로 bean을 생성해라. => point, circle 2가지 bean 이 생성되며 이 들을 factory변수가 관리
Point point = (Point)factory.getBean("point"); // getBean()이 받는 파라미터는 xml에서 작성한 id임, Object 타입의 객체를 반환해서 다운캐스팅해줌
Circle circle = (Circle)factory.getBean("circle");
System.out.println(point.getXpos() + ", " + point.getYpos());
circle.display();
*/
/* 객체를 생성하는 방법3. ApplicationContext 컨테이너를 이용해 객체가 생성되도록 하는 방법 */
ApplicationContext context = new ClassPathXmlApplicationContext("appContext.xml");
Point point = (Point)context.getBean("point");
Circle circle = (Circle)context.getBean("circle");
System.out.println(point.getXpos() + ", " + point.getYpos());
circle.display();
}
}package sample3;
public interface Circle {
public void display();
public double getArea();
}package sample3;
public interface Point {
public double getXpos();
public void setXpos(double xpos);
public double getYpos();
public void setYpos(double ypos);
}package sample3;
public class CircleImpl implements Circle{
private Point point;
private double radius;
public CircleImpl(Point point, double radius) {
super();
this.point = point;
this.radius = radius;
}
@Override
public void display() {
System.out.println("원의 중심 : " + point.getXpos() + " , " + point.getYpos());
System.out.println("원의 면적 : " + getArea());
}
@Override
public double getArea() {
return Math.pow(radius, 2.0) * Math.PI;
}
}package sample3;
public class PointImpl implements Point{
private double xpos;
private double ypos;
@Override
public double getXpos() {
return xpos;
}
@Override
public void setXpos(double xpos) {
this.xpos = xpos;
}
@Override
public double getYpos() {
return ypos;
}
@Override
public void setYpos(double ypos) {
this.ypos = ypos;
}
}Spring Bean Configuration XML 파일 작성방법 Case2
(컨테이너에 의해 자동으로 생성되고 관리될 객체를 클래스 이름위에 @Component 어노테이션을 붙여 등록하는 경우)
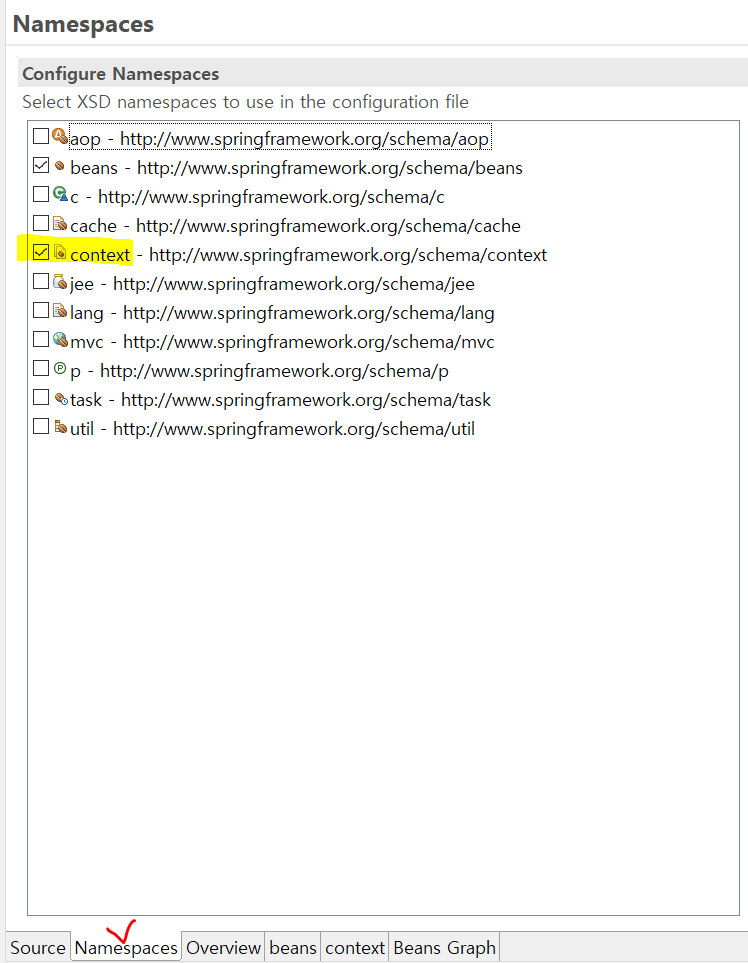
<?xml version="1.0" encoding="UTF-8"?>
<beans xmlns="http://www.springframework.org/schema/beans"
	xmlns:xsi="http://www.w3.org/2001/XMLSchema-instance"
	xmlns:context="http://www.springframework.org/schema/context"
	xsi:schemaLocation="http://www.springframework.org/schema/beans http://www.springframework.org/schema/beans/spring-beans.xsd
		http://www.springframework.org/schema/context http://www.springframework.org/schema/context/spring-context-3.1.xsd">

	<!-- 패키지 여기를 한 번 스캔해보라는 의미, 내가 추가해준 부분 -->
	<context:component-scan base-package="myPkg2"/>

</beans>
package myPkg2;
import org.springframework.context.ApplicationContext;
import org.springframework.context.support.ClassPathXmlApplicationContext;
public class Main {
public static void main(String[] args) {
// PointX px = new PointX();
// PointY py = new PointY();
//
// CircleImpl circle = new CircleImpl();
// circle.setPointX(px);
// System.out.println(circle.make());
//
// RectangleImpl rec = new RectangleImpl();
// rec.setPointy(py);
// System.out.println(rec.make());
// myPkg2 를 살펴보라는 의미. 컴포넌트, 와이어드, 등등이 있는데 이 관계를 이애한 상태에서 그 다음 아래 작업을 수행하게 됨.
ApplicationContext context = new ClassPathXmlApplicationContext("appContext.xml");
Circle circle = (Circle)context.getBean("myCircleImpl"); // RectangleImpl클래스의 Componet에 적혀있던 참조변수 이름
System.out.println(circle.make()); // px 객체를 밀어넣어서 "X를 만들다" 라고 나올 것임.
Rectangle rectangle = (Rectangle)context.getBean("myRectangleImpl"); // RectangleImpl클래스의 Componet에 적혀있던 참조변수 이름
System.out.println(rectangle.make()); // py 객체를 밀어넣어서 "Y를 만들다" 라고 나올 것임.
}
}package myPkg2;
public interface Circle {
int getX();
int getY();
String make();
}package myPkg2;
public interface Rectangle{
int getX();
int getY();
String make();
}package myPkg2;
public interface Shape {
String make();
String delete();
}package myPkg2;
import org.springframework.beans.factory.annotation.Autowired;
import org.springframework.beans.factory.annotation.Qualifier;
import org.springframework.stereotype.Component;
@Component("myCircleImpl")
public class CircleImpl implements Circle{
@Autowired // @Autowired는 바로 밑의 변수에만 영향력을 행사하며, 컨테이너가 관리중인 객체 중에서 참조변수가 가지는 타입과 일치하는 것을 찾아 객체의 주소를 자동으로 할당해준다.(이 동작을 위해 setter도, 생성자도 호출되지 않음)
@Qualifier("px") // px는 PointX 클래스에서 Componet에 써 놓은 이름인데, 아래 변수가 Shape 인터페이스 타입이라서 정확히 이를 구현한 구현객체 중에 누가 적합한지 적어준 것임. 참조변수의 타입이 Shape이 아니라 PointX 타입이었다면 이 어노테이션은 작성하지 않아도 된다. 혹은 참조변수의 타입이 Shape이더라도 컨테이너가 관리하는 Shape 인터페이스의 구현 객체가 하나면 @Qualifier 사용 안해도 된다고 함.
Shape pointX;
int x;
int y;
int radius; // 반지름
public CircleImpl() {
System.out.println("CircleImpl의 생성자가 호출됨");
}
public Shape getPointX() {
return pointX;
}
public void setPointX(Shape pointX) {
System.out.println("CircleImpl의 setPointX()가 호출됨"); // 호출 안됨. @Autowired 는 setter 를 호출하는게 아니기 때문. @Autowired 는 그냥 컨테이너가 관리중인 객체의 주소를 할당하는 방식인가봄
this.pointX = pointX;
}
@Override
public int getX() {
return x;
}
@Override
public int getY() {
return y;
}
@Override
public String make() {
return pointX.make();
}
}package myPkg2;
import org.springframework.beans.factory.annotation.Autowired;
import org.springframework.beans.factory.annotation.Qualifier;
import org.springframework.stereotype.Component;
@Component("myRectangleImpl")
public class RectangleImpl implements Rectangle{
@Autowired
@Qualifier("py")
Shape pointy; //인터페이스 타입이라서 이 인터페이스를 상속받은 객체는 모두 여기에 들어올 수 있음.
int x;
int y;
int radius; // 반지름
public Shape getPointy() {
return pointy;
}
public void setPointy(Shape pointy) {
this.pointy = pointy;
}
@Override
public int getX() {
return x;
}
@Override
public int getY() {
return y;
}
@Override
public String make() {
return pointy.make();
}
}package myPkg2;
import org.springframework.stereotype.Component;
@Component("px") //이 어노테이션은 객체를 만드는 기능으로 PointX px = new PointX(); 와 같음 여기서 인자는 클래스 이름과 같은 명칭도 사용 가능함. ex) ("PointX")
public class PointX implements Shape{
public PointX() {
System.out.println("PointX의 생성자가 호출됨");
}
@Override
public String make() {
// TODO Auto-generated method stub
return "X를 만들다";
}
@Override
public String delete() {
// TODO Auto-generated method stub
return "X를 지우다";
}
}package myPkg2;
import org.springframework.stereotype.Component;
@Component("py")
public class PointY implements Shape{
public PointY() {
System.out.println("PointY의 생성자가 호출됨");
}
@Override
public String make() {
// TODO Auto-generated method stub
return "Y를 만들다";
}
@Override
public String delete() {
// TODO Auto-generated method stub
return "Y를 지우다";
}
}'K-DigitalTraining 강의 > 11. Spring' 카테고리의 다른 글
| 로그인 화면으로 이동했다가 다시 원래 위치로 돌아가도록 구현하는 방법 (0) | 2022.09.01 |
|---|---|
| 스프링(Spring)에서 jsp 파일을 바로 실행하기 위한 jsp 파일 위치 (0) | 2022.08.28 |
| 8. 스프링(Spring)에서의 의존성 주입(DI, Dependency Injection) 방법 (0) | 2022.08.23 |
| 7. 의존성 주입(DI, Dependency Injection) 이란 (0) | 2022.08.23 |
| 6. 스프링(Spring), 컨테이너의 종류 (0) | 2022.08.20 |